Overview
Employee Self Service is the payroll portal that allows you to view and download all historic and current payslips and P45’s.
It is also the portal that is used to submit any mileage and expense claims.
ESS is a hosted web link. You can access ESS from any devise (TWBC or personal), but Multi Factor Authentication is in place to ensure that your personal data is only accessed by you.
ESS does not work with Internet Explorer. Please ensure that the Browser that you are using is Chrome or Firefox.
The link to log in can be found below.
If you have any issues with multi factor authentication you can contact the IT Service Desk on 01622 602602.
System Preferences
Your payslips will continue to be emailed to your TWBC email address on pay day.
You can change where the payslips are emailed to and/ or change the password to open the payslip through ESS.
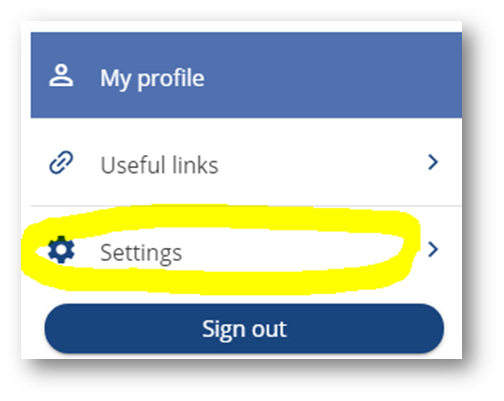
- Go to the top right corner of ESS and click on the person icon:

- Then choose ‘Settings’:
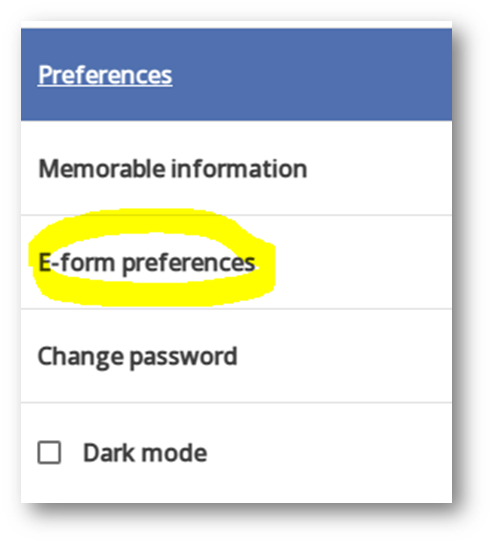
- To Change the email address that your payslip goes to, choose ‘E-Form preferences’:
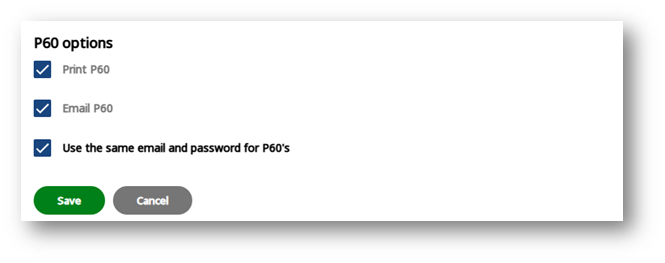
- Here you can change the email address and password:
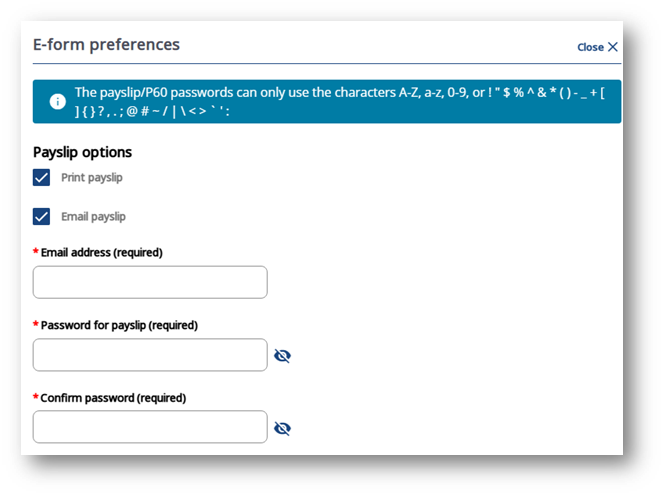
- Scroll to the bottom to save changes:
Your Pay
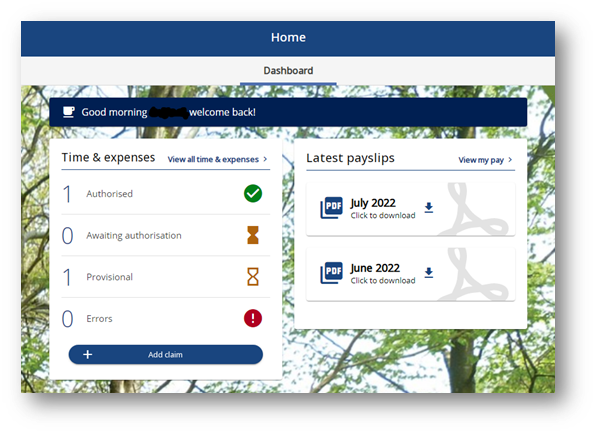
- When you first log into ESS you will see the current and last month payslip on the home screen:
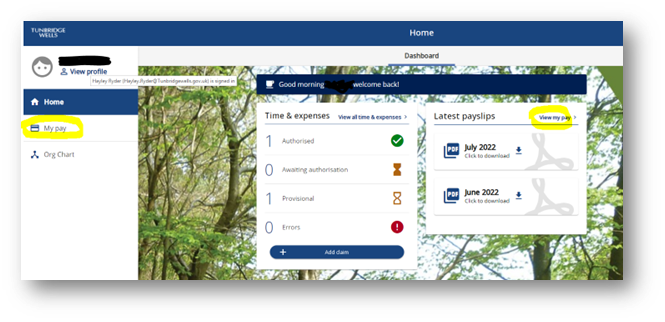
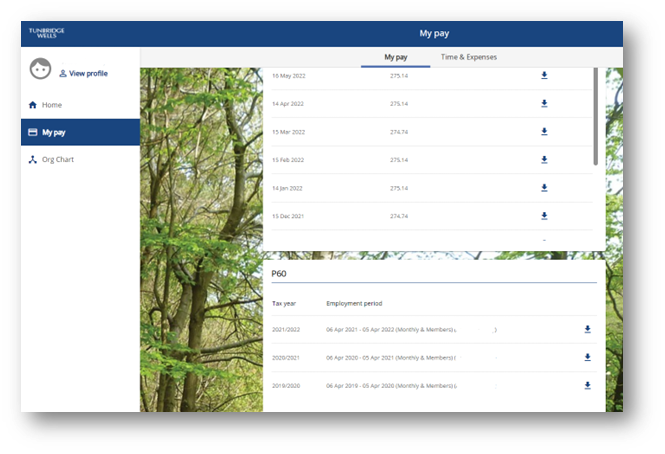
- If you click on ‘My Pay’ or ‘View my pay’ you are taken to a full list of all payslips:
The P60’s can be found below the list of payslips in the ‘My Pay’ section:
Mileage Claims – Vehicle set up
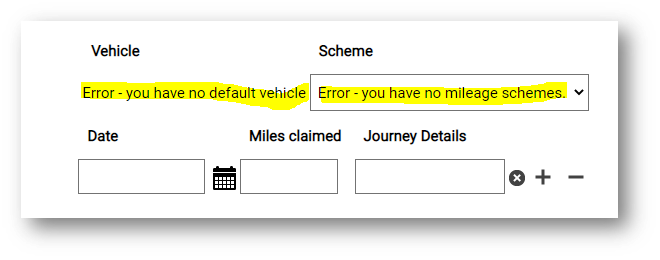
In order to submit a mileage claim the vehicle must first be set up in the system.
If the vehicle is not set up, you will get an error message when trying to submit a claim:
To set up your vehicle we need the below documents:
- A copy of Certificate of Motor Insurance, showing cover for business use
- A copy of your driving licence
- A copy of your current MOT certificate (if applicable)
- Log into iTrent ESS using Chrome or Firefox as your internet browser.
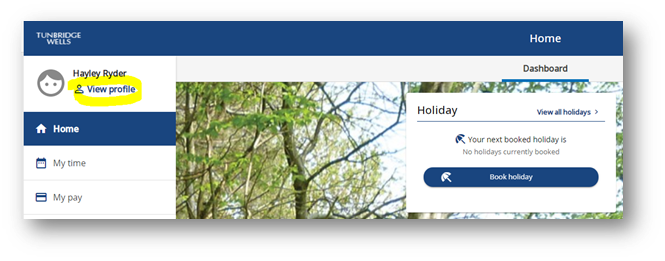
Go to ‘View Profile’ (top left corner under your name):
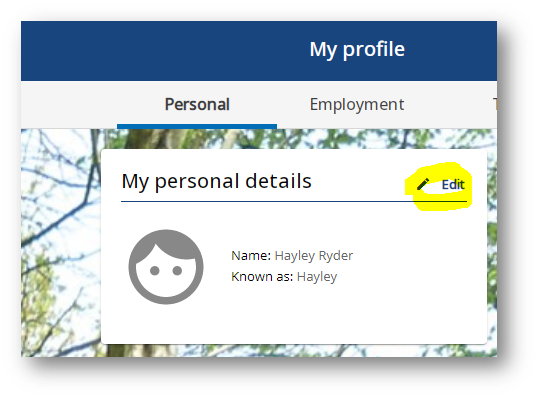
- Then click ‘Edit’ on ‘My Personal Details’:
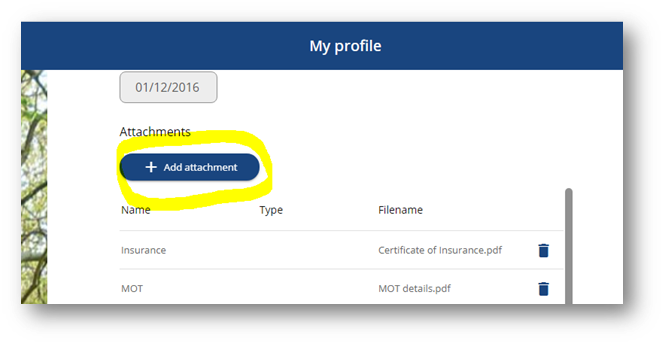
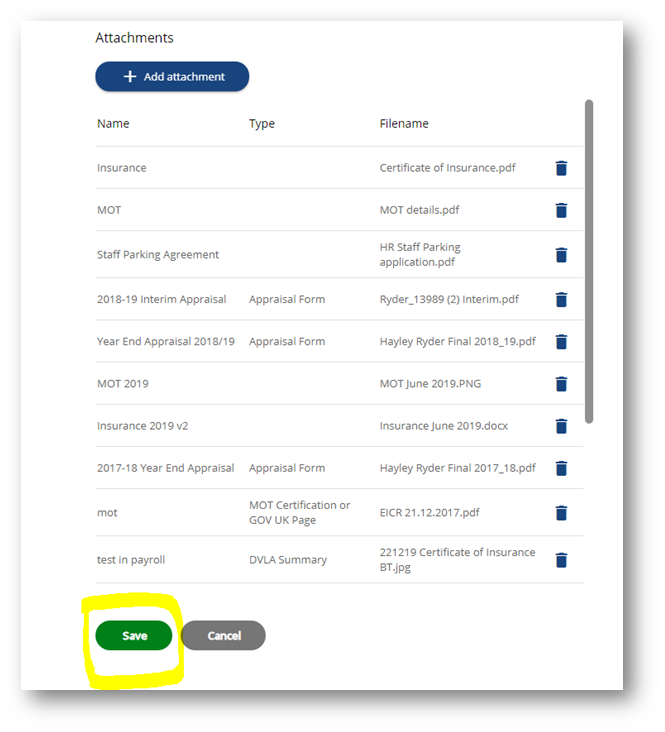
- Scroll down and then click on the ‘+ Add attachment’ button:
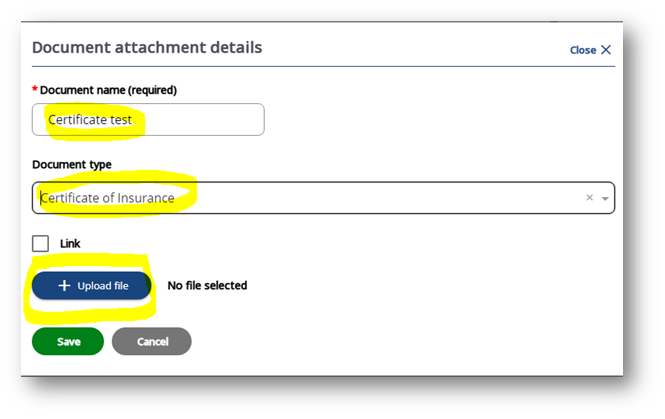
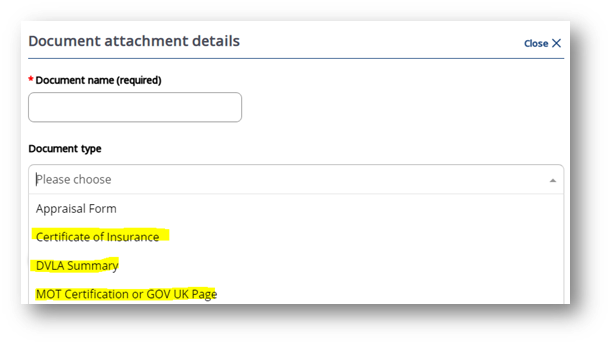
- Enter a name for the document
Choose the document type from the drop down list
Click upload file:
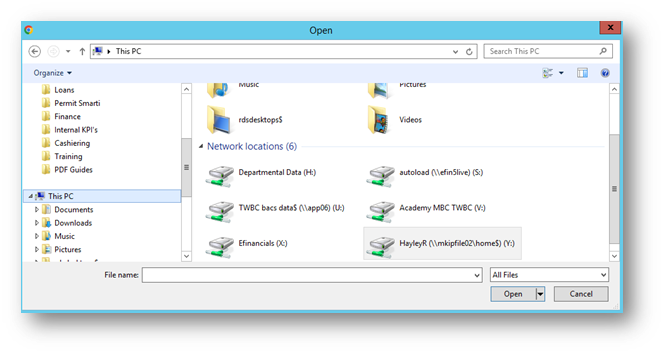
- Locate the document that you have saved and click ‘Open’:
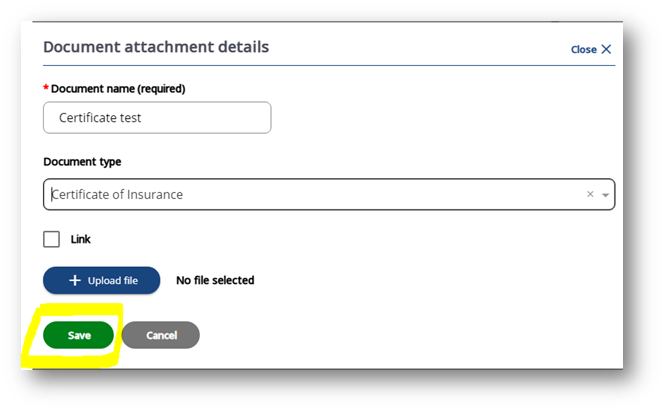
- Click ‘Save’:
- Then click ‘Save’ again:
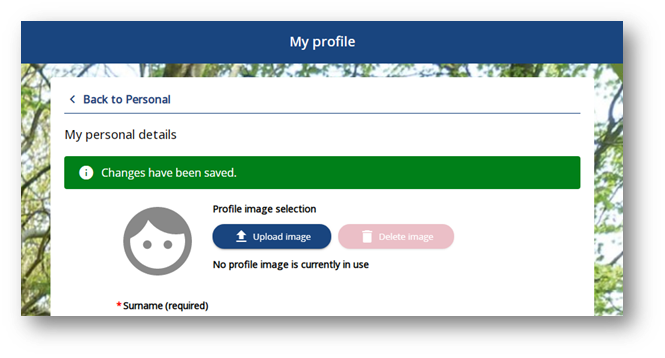
- You will get confirmation that changes have been saved:
- Payroll will receive an automated email when you attach a document and choose one of the below highlighted document types:
Payroll will let you know when your vehicle is set up and mileage claims can be made.
Payroll keep track of when your MOT and insurance documents are due to expire. We will send you an email before this happens reminding you to upload the new documents when you receive them.
Submitting a mileage claim
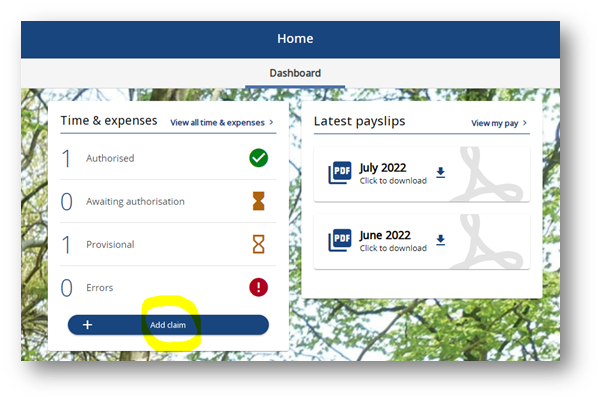
- Click on ‘Add claim’ on the Dashboard (Home) page:
- Enter the start date of the claim (earliest journey date).
Chose Claim template ‘Mileage’:
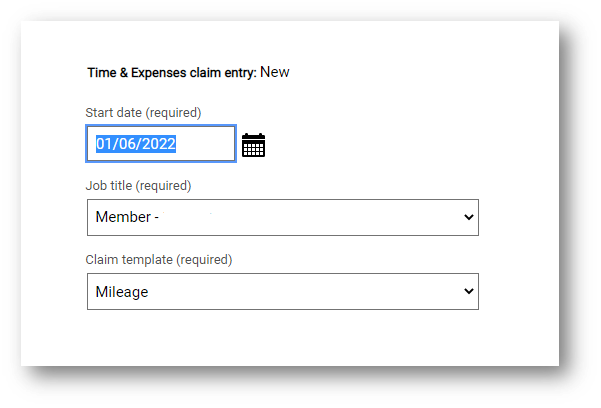
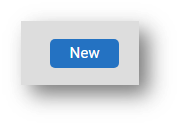
- Click ‘New’:

- Enter date, miles and journey details. Add another journey by clicking on the ‘+’ icon:
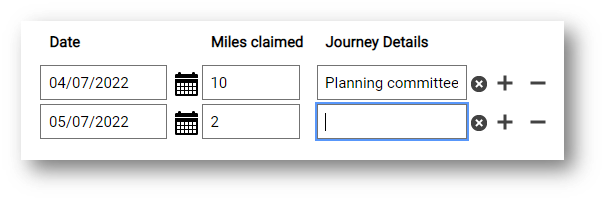
- If you want to add some more lines at a later date click the ‘Save draft’ button:
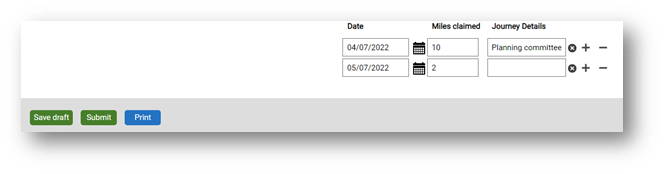
- When your claim is complete, click ‘Submit’.
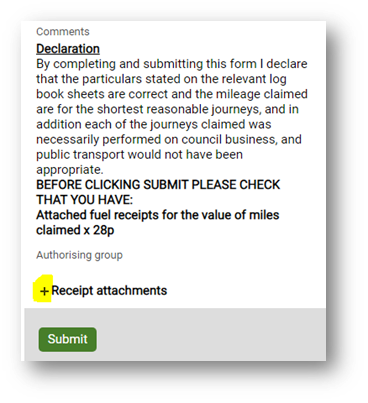
Ensure that you attach a fuel receipt before submitting the claim.
All claims must be supported with a VAT fuel receipt to the value of 28p per mile claimed. Please note that it must be a purchase receipt (HMRC do not allow credit or debit card slips).
This is so that TWBC can reclaim the VAT element.
So, if you are claiming 10 miles you need to attach a VAT fuel receipt of £2.80 or more (10 x 28p).
- Once you have clicked submit on the claim details page, scroll down to the bottom.
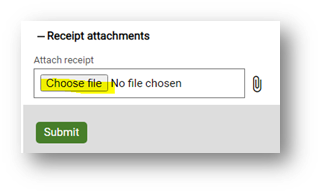
Click on the ‘+’ icon next to Receipt attachments:
- Scroll down again
Click on ‘Choose file’:
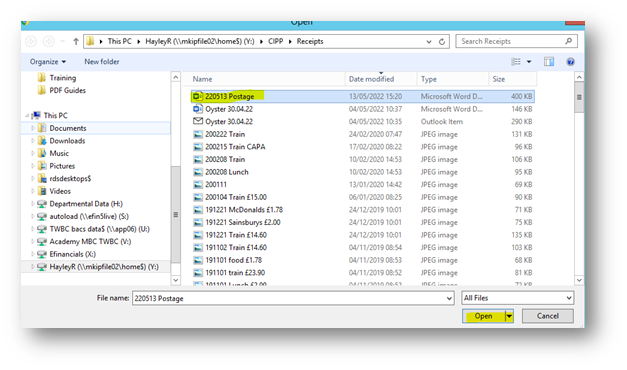
- Find the receipt that you have saved and double click or highlight and choose ‘Open’
- Click ‘Submit’.
Submitting an expense claim
- Click on ‘Add claim’ on the Dashboard (Home) page:
- Enter date of claim and choose Claim template ‘Expense Claim’:
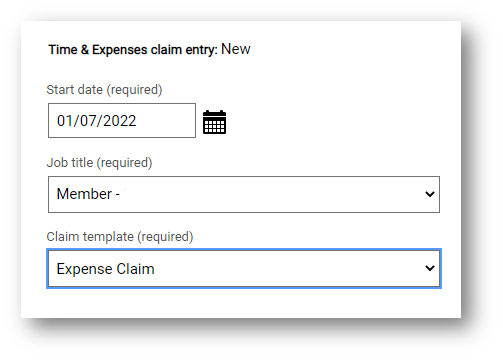
- Click ‘New’:
- Chose the Element from the drop down list,
Enter the date of claim (or click on calendar),
Enter the purpose (details of why the expense was incurred),
Enter the cost code (this will be K223660 generally),
Enter the gross amount:
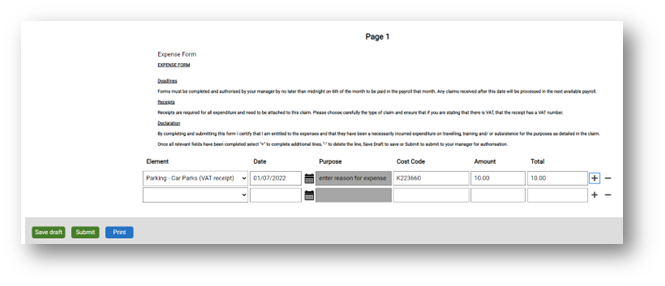 Add additional lines by clicking on the ‘+’ icon.
If you want to add some more lines at a later date click ‘Save draft’. - When your claim is complete, click ‘Submit’.
Ensure that you attach a receipt before submitting the claim.
All claims must be supported with a VAT fuel receipt to the value of 28p per mile claimed. Please note that it must be a purchase receipt (HMRC do not allow credit or debit card slips).
This is so that TWBC can reclaim the VAT element.
So, if you are claiming 10 miles you need to attach a VAT fuel receipt of £2.80 or more (10 x 28p).
- Once you have clicked submit on the claim details page, scroll down to the bottom.
Click on the ‘+’ icon next to Receipt attachments:
- Scroll down again
Click on ‘Choose file’:
- Find the receipt that you have saved and double click or highlight and choose ‘Open’
- Click ‘Submit’.
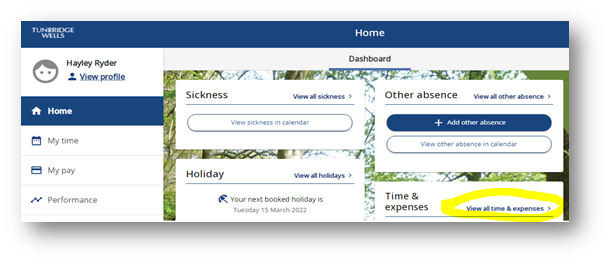
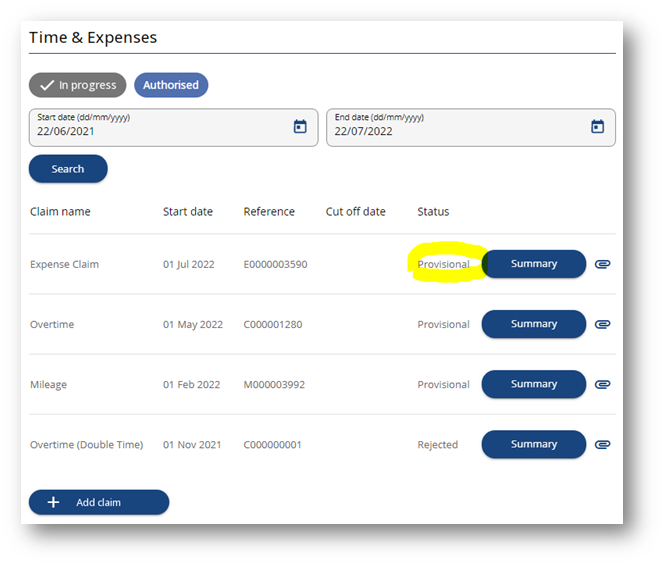
- Log into ESS, click on ‘View all time & expenses’:
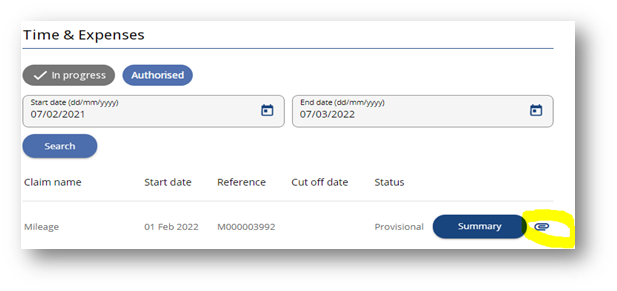
- Then click on the paperclip to the right of the claim ‘awaiting authorisation’:
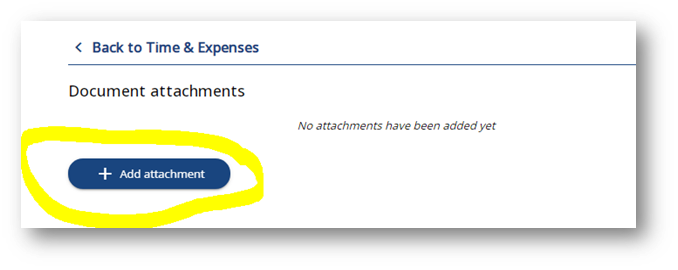
- Then click ‘+ Add attachment’:
- Give the document a name and upload saved receipt (leave doc type and link tick box blank):

- Save, close
Repeat until all receipts uploaded
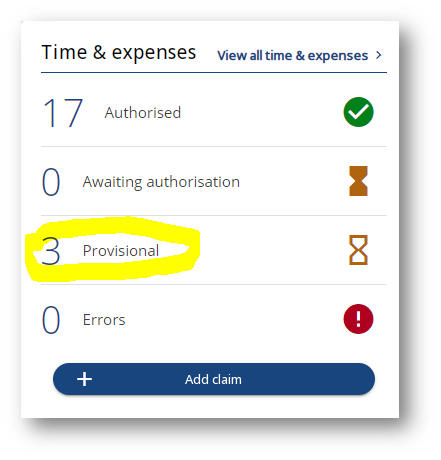
Claim status
If the claim has not yet been submitted it is in draft format and shows as ‘Provisional’:
All claims once submitted will automatically be workflowed to the Service Manager (Democratic & Executive Support). Once authorised by them, they are workflowed to Payroll to second authorise.
You will receive automated emails at each stage so that you are aware of the progress of the claim.
Once authorised by Payroll the claim will be processed for payment in the next payroll and the status will change from ‘Awaiting Authorisation’ to ‘Authorised’.
If there are any errors in the claim (for example, no vehicle is set up) the status will be ‘Errors’.
Cut off dates
In order to be paid in the payroll on 15th, the claims must be submitted and authorised by the Service Manager (Democratic & Executive Support) by no later than midnight on 6th of the month.
For instance, any claims authorised by 6th August 2022 will be paid on 15th August 2022.